Monday, November 30, 2009

Gmail - More & More powerful now

Of course you use Gmail. But for email, right? Did you know that you can use Gmailfor a lot many other things too?

1. Use Gmail As A Free Online File Format Converter


If you want to convert any office document to HTML format, think of nothing other than Gmail.
You don’t have to install third-party application like PDF2HTML or Adobe Acrobat for this. You can convert doc, xls, ppt, rtf, pdf files and the new Microsoft Office 2007 formats like docx, xlsx and pptx to HTML, absolutely free by using Gmail.
Just attach the document to a mail and send it to yourself. When you receive the mail open it and click “View as HTML”.


2. Use Gmail As An MP3 Player


If you want to try out a new audio player, try Gmail!
Send an mp3 file to yourself and see that Gmail contains an option to play it. Clicking it will open a flash MP3 player using which you can play the song without downloading it.

3. Use Gmail As Your OpenID


You can use your Google account username and password to login at a number of sites like Zoho and Plaxo. But what about the sites that accepts only a URL as an OpenID field?
Welcome to openid-provider.appspot.com. This site, built on Google App Engine, allows you to create a OpenID URL from your Google Account Credentials. Login with your Gmail username and password and the site will provide you a URL like http://openid-provider.appspot.com/, which you can use on regular OpenID accepting sites.

4. Use Gmail To Play Snakey
If all that emails are making you bored, try the game that comes packed with Gmail.
Gmail labs contains a game – Old Snakey, that you first need to enable from the settings pane in order to play. Go to Gmail settings> Labs and set the Old Snakey radio button to enabled. Now, return back to inbox and hit the '&'  key to start the game.

How To Format USB Drive with NTFS File System

How To Format USB Drive with NTFS File System
In Windows Xp for formatting USB Drive only FAT or FAT32 Option is there if you wish to enable and use NTFS Format Option then continue reading this article

What are the Advantages Of NTFS
?
The advantage of NTFS file system is more security options and fast. Normally USB drive capacity is very small enough that NTFS is not recommended But, nowadays USB drives are coming with larger capacity also . So we can format USB drive with NTFS to have more security options

NTFS enabled USB Drives are write-able only on one PC and becomes read only on all other PCs. Hence , we can read and write on our own PC and transfer files to elsewhere without any fear of virus.

In Windows XP, only FAT and FAT32 file systems are available in format options use the below steps to format in NTFS File System.
  • Insert USB drive in your PC
  • Go to Device Manager (Start > Run  > devmgmt.msc)
  • Select Disk Drives and expand.
  • Right Click on USB drive and select Properties.
  • Go to policies tab and select Optimize for performance and press OK
  • Now Right click on USB Drive and select Format Option.

Now you can have NTFS option there.

Check system for viruses


This is basically using to check incase if your system has infected any kind of viruses..


1- go to start-run-command
2- cd..  and press enter
   cd.. (again) and press enter
3-  cd windows and press enter
4- cd system32 and press enter
5- setup  and enter


Then you have to switch to the control panel to install components and systems composition
Then that means your pc is clean.
The idea here is the (setup)file which is located within (system32)is shut down when your pc infected and open when your pc is not infected because most viruses shut down all system.exe extensions.

View & work with same worksheet in more that 2 places at a time

you can work with different places in same workbook at a time

Window Menu > New window 

You can see two instances of same workbook

Note : For more easy perfomance, Make workbook window in "Restore Mode" not in "maximize" mode

Switch / Toggle between Excel work books opened

There is a quick method of switching between spreadsheet windows that uses the keyboard. To do this, simply press Ctrl+F6. This will cycle you between your open workbooks. For instance, if you have three workbooks open, and you press Ctrl+F6 three times, you will be back to your original workbook window.

Worksheet Shortcuts - Very useful


Action Key
Moving Forward to next worksheet Ctrl + pagedown
Moving Backward to next worksheet Ctrl+ Pageup
Selecting Multiple worksheets- Forward Ctrl + Shift + pagedown
Selecting Multiple worksheets- Backward Ctrl + Shift + pageup


Excel Shortcuts: Selecting

These shortcuts help you to quickly select items in your Excel file in various ways.
  • Shift+Spacebar: Select the current Row
  • Ctrl+Spacebar: Select the current column
  • Ctrl+A: Select All, will select everything on the current worksheet. This is most often used in conjunction with the copy shortcut.

Defining & Deleting Global Names

 Defining a Name

 Names are used so that you can refer to a single cell or a cell range using something meaningful to you. You can define a name using Excel's menus by following these steps:


  1. Select the cell or cell range you want the name to represent.
  2. Choose Name from the Insert menu, and then Define from the resulting submenu. Excel displays the Define Name dialog box. 
  3. Replace the suggested name (if any) with the name you want to use for the cell or cell range you selected in step 1.
  4. Click on Add. Your name is now defined.
  5. Click on OK to close the Define Name dialog box.
The names you define in Excel can be up to 255 characters in length and contain any numbers or letters, as well as the period, backslash, question mark or underscore. Names cannot contain any other special characters, including spaces. In addition, names must start with either a letter, backslash or the underscore.
You can also define a name by using the formula bar. To use this method, follow these steps:
  1. Select the cell or cell range you want the name to represent.
  2. Click in the area at the very left of the formula bar.
  3. Type the name you want to define, pressing Enter when done.
The name is defined and appears in the formula bar area whenever the cell or cells are selected.


Deleting Names


There may come a time when you want to delete names you previously defined and used in Excel. To do this, follow these steps:
  1. Choose Name from the Insert menu, and then Define from the resulting submenu. Excel displays the Define Name dialog box. :)  It sounds strange to choose Define when you want to delete something, but that is the way Excel is designed.
  2. In the list of available names, select the one you want to delete.
  3. Click on the Delete button. The name is removed from the list.
  4. Repeat steps 2 and 3 for other names you want to delete
  5. Click on OK to close the Define Name dialog box.

Give Superb look for your excel sheet

1. Remove Annoying Gridlines from your sheet Click here

2.Remove Page Breaks

Steps
1. Open your worksheet , Go to Tools Menu > Options 
2. In View Tab , You can see Window Options 
3. By Defult Page Breaks are ticked, Untick it , Click ok Button

3. Remove Row & Coloumn Headers 

 Steps
1. Open your worksheet , Go to Tools Menu > Options 
2. In View Tab , You can see Window Options 
3. By Defult Row & Coloumn Headers  are ticked, Untick it , Click ok Button

4. Remove Scroll bars

Steps
1. Open your worksheet , Go to Tools Menu > Options 
2. In View Tab , You can see Window Options 
3. By Defult Horizondal Scroll bars & Vertical Scroll bars  are ticked, Untick both  , Click ok Button

5. Remove sheet Tabs
Note: Only Use this option if you have only 1 worksheet / you have hyperlinks to other sheets.
Steps
1. Open your worksheet , Go to Tools Menu > Options 
2. In View Tab , You can see Window Options 
3. By Defult sheet Tabs  are ticked, Untick it  , Click ok Button

Remove Gridlines From excel sheet

Fed up with watching gridlines in you excel sheet ?

Steps

1. Open your worksheet , Go to Tools Menu > Options 
2. In View Tab , You can see Window Options 
3. By Defult Gridlines are ticked, Untick it , Click ok Button

Then You have it


Note: If you want to change color of gridlines, there is an option under it, change gridlines color in it & Tick Gridlines.

Removing Borders in Excel

Adding borders to cells is a very common thing in Excel. You may add them to help draw attention to number, or to divide numbers from column headings in a table.

Here is a quick way you can remove any borders applied to a cell or group of cells: simply press Ctrl+_ Ie, Ctrl + Shift + _ . (That is the underscore, which means you must hold down the Shift key as well.) Excel leaves the other formatting of the cell set, but removes any borders.

Saturday, November 28, 2009

Streaming Videos , Channels, News

Streaming Videos , Channels, News, etc
http://www.malayalamlive.com/

Kerala Sites


http://thatsmalayalam.oneindia.in/

Puzzles N Riddles


Useful

http://www.cyberlawsindia.net/

How to Create a Notepad diary / Scheduler

Here are the simple steps to use the Windows Notepad as a simple digital diary /  Scheduler

  1. Just open the Notepad and type .LOG and press enter.
  2. Save the Notepad file with any name of you want.
  3. After saving it, Close the Notepad and open it again.
  4. Surprisingly you can see the current date and time being inserted automatically after the  .LOG line.
  5. Now write your daily/hourly activities easily in the next lines
  6. After that save the file & Close
  7. When Your open that file next time, you can see current date & Time in the next line again automatically

Note : If you want to bring the current date and time just press shortcut key F5, Its another option

MS Access ShortCuts


ACCESS

Action
Keystroke
Database actions
Open existing database
CTRL+O
Open a new database
CTRL+N
Save
CTRL+S
Save record
SHIFT+ENTER
Print
CTRL+P
Display database window
F11
Find and Replace
CTRL+F
Copy
CTRL+C
Cut
CTRL+X
Paste
CTRL+V
Undo
CTRL+Z
Help
F1
Toggle between Form and Design view
F5
Other
Insert line break in a memo field
CTRL+ENTER
Insert current date
CTRL+;
Insert current time
CTRL+:
Copy data from previous record
CTRL+'
Add a record
CTRL++
Delete a record
CTRL+-

 
Action
Keystroke
Editing
Select all
CTRL+A
Copy
CTRL+C
Cut
CTRL+X
Paste
CTRL+V
Undo
CTRL+Z
Redo
CTRL+Y
Find
CTRL+F
Replace
CTRL+H
Spell checker
F7
Toggle between Edit mode and Navigation mode
F2
Open window for editing large content fields
SHIFT+F2
Switch from current field to current record
ESC
Navigating Through a datasheet
Next field
TAB
Previous field
SHIFT+TAB
First field of record
HOME
Last field of record
END
Next record
DOWN ARROW
Previous record
UP ARROW
First field of first record
CTRL+HOME
Last field of last record
CTRL+END


Power Point ShortCuts

POWERPOINT 

Action
Keystroke
Document actions
Open a presentation
CTRL+O
New presentation
CTRL+N
Save As
F12
Save
CTRL+S
Print
CTRL+P
Help
F1
Presentation actions
Begin slide show
F5
Next slide
ENTER or
Down arrow key
Previous slide
BACKSPACE or
Up arrow key
Activate pen tool
CTRL+P
Erase pen strokes
E
Deactivate pen tool
CTRL+A
Show/Hide black screen
B
Show/Hide white screen
W
Show/Hide pointer & button
A
End slide show
ESC


Action
Keystroke
Formatting
Select all
CTRL+A
Copy
CTRL+C
Cut
CTRL+X
Paste
CTRL+V
Undo
CTRL+Z
Redo
CTRL+Y
Bold
CTRL+B
Italics
CTRL+I
Underline
CTRL+U
Left justified
CTRL+L
Center justified
CTRL+E
Right justified
CTRL+R
Promote list item
ALT+SHIFT+Left arrow
Demote list item
ALT+SHIFT+Right arrow or TAB
Editing
Find
CTRL+F
Replace
CTRL+H
Insert hyperlink
CTRL+K
New slide
CTRL+M
Spell checker
F7
Macros
ALT+F8

Run the slide show and press the F1 key to view all keyboard shortcuts applicable when running a slide show.

Thursday, November 26, 2009

Excel Shortcuts

>
EXCEL
 Note: A plus sign indicates that the keys need to be pressed at the same time.
Action
Keystroke

Document actions

Open a file
CTRL+O

New file
CTRL+N

Save As
F12

Save
CTRL+S

Print
CTRL+P

Find
CTRL+F

Replace
CTRL+H

Go to
F5

Cursor Movement
One cell up
up arrow
One cell down
down arrow
One cell right
Tab
One cell left
SHIFT+Tab
Top of worksheet (cell A1)
CTRL+Home
End of worksheet
(last cell with data)
CTRL+End
End of row
Home
End of column
CTRL+left arrow
Move to next worksheet
CTRL+PageDown
Formulas

Apply AutoSum
ALT+=

Current date
CTRL+;

Current time
CTRL+:

Spelling
F7

Help
F1

Macros
ALT+F8


Action
Keystroke

Selecting Cells

All cells left of current cell
SHIFT+left arrow

All cells right of current cell
SHIFT+right arrow

Entire column
CTRL+Spacebar

Entire row
SHIFT+Spacebar

Entire worksheet
CTRL+A

Text Style

Bold
CTRL+B

Italics
CTRL+I

Underline
CTRL+U

Strikethrough
CTRL+5

Formatting
Edit active cell
F2
Format as currency with 2 decimal places
SHIFT+CTRL+$
Format as percent with no decimal places
SHIFT+CTRL+%
Cut
CTRL+X
Copy
CTRL+C
Paste
CTRL+V
Undo
CTRL+Z
Redo
CTRL+Y
Format cells dialog box
CTRL+1


Word Shortcuts


WORD
Note: A plus sign indicates that the keys need to be pressed at the same time.

Action
Keystroke
Document actions
Open a file
CTRL+O
New file
CTRL+N
Close a file
CTRL+W
Save As
F12
Save
CTRL+S or SHIFT+F12
Print Preview
CTRL+F2
Print
CTRL+P
Show/Hide paragraph symbols
CTRL+*
Spelling and grammar
F7
Help
F1
Find
CTRL+F
Replace
CTRL+H
Go To
CTRL+G

Cursor movement
Select all - entire document
CTRL+A
Select from cursor to beginning of line
SHIFT+Home
Select from cursor to end of line
SHIFT+END
Go to beginning of line
HOME
Go to end of line
END
Go to beginning of document
CTRL+Home
Go to end of document
CTRL+End

Formatting
Cut
CTRL+X
Copy
CTRL+C
Paste
CTRL+V
Undo
CTRL+Z
Redo
CTRL+Y
Format painter
CTRL+SHIFT+C
Left alignment
CTRL+L
Center alignment
CTRL+E
Right alignment
CTRL+R
Justified
CTRL+J
Delete previous word
CTRL+Backspace
Apply bulleted list
CTRL+SHIFT+L
Indent
CTRL+M
Page break
CTRL+Enter


Action
Keystroke
Text Style
Font face
CTRL+SHIFT+F
Font size
CTRL+SHIFT+P
Bold
CTRL+B
Italics
CTRL+I
Underline
CTRL+U
Double underline
CTRL+SHIFT+D
Word underline
CTRL+SHIFT+W
All caps
CTRL+SHIFT+A
Change case
SHIFT+F3
Subscript
CTRL+=
Superscript
CTRL+SHIFT+=
Make web hyperlink
CTRL+K

Tables
Go to next cell
Tab
Go to previous cell
SHIFT+Tab
Go to beginning of column
ALT+PageUp
Highlight to beginning of column
ALT+SHIFT+PageUp
Go to end of column
ALT+PageDown
Highlight to end of column
ALT+SHIFT+PageDown
Go to beginning of row
ALT+Home
Highlight to beginning of row
ALT+SHIFT+Home
Go to end of row
ALT+End
Highlight to end of row
ALT+SHIFT+End
Column break
CTRL+SHIFT+Enter

Miscellaneous
Copyright symbol - ©
ALT+CTRL+C
Date field
ALT+SHIFT+D
Go to footnotes
ALT+CTRL+F
Show/Hide 
CTRL+SHIFT+8
Thesaurus
SHIFT+F7


5 Littre

Steps
1. Fill 5 Litre Jug first
2. Pour it to 3 Litre Jug, Then you have 2 litre of water in big one & 3 litre in small jug
3. Emply small jug & pour 2 litre to small jug
4. Again fill Big jug.
5. Pour water to small jug which already have 2 littre in it & You will fill littre in to It
     Finally you have 3 littre in small Jar & 4 Littre in Big Jar

Monkey

The Answer Is ......... If A Big Monkey  Like You Doesn't Know The Answer. How Do You Expect A Small Baby Monkey  To Know .......                 Chill Man ..

Answer

Answer: She was hoping that the guy would appear at the funeral again.

If you answered this correctly , you think like a psychopath .. This was a test by a famous American Psychologist used to test if one has the same mentality as a killer. Many arrested serial killers took part in the test and answered the question correctly. If you didn't answer the question correctly, good for you.

Be sure to share the test!


Always be positive.... ..

Phsycho Test

A woman , while at the funeral of her own mother, meets a guy whom she did not know. She thought this guy was simply ' amazing' , very much of her dream guy, she believed him to be just that! She fell in love with him right  there, but never asked for his number and could not find him.

A few days later she killed her FIRST sister.
Question: What is her motive in killing her sister?

(Give this some thought before you answer).


FIND THE ANSWER


Once There Was A Small Baby  Monkey Stranded On A Small Island .
There Was Nothing On This Island Except Dry Grass And A Single Coconut Tree with Many Coconuts.
One Hot Day The Dry Grass Caught Fire. The Fire Spread Quickly And Soon The Whole Island Was On Fire.

To Escape The Fire The Small Baby Monkey
 Climbed Up The Coconut Tree, But The Wind Was Strong And The Fire Was Quickly Working Its Way Towards The Tree.

By Now The Tree And The Monkey Was Surrounded By Fire.

The Question Now Is, WHAT SHOULD THE SMALL BABY MONKEY
 DO TO ESCAPE THE FIRE

Cick Here for answer :  http://legendzworld.blogspot.com/2009/11/monkey.html


You need to Get 4 Littre of Water


You have two jugs, you are standing beside a well.
One jug has a content of 3 ltrs and the other one has a content of 5 ltrs.

How can you get just 4 liters of water using only these two jugs? 


Wednesday, November 25, 2009

Disclaimer

ഐ.ടി. ആക്ടിലെ (ഭേദഗതി) 66-ാം സെക്ഷന്റെ വ്യാഖ്യാനത്തിലാണ്‌ ഫോര്‍വേഡുകള്‍ പെടുന്നത്‌. നേരത്തേ, കമ്പ്യൂട്ടര്‍ നുഴഞ്ഞുകയറ്റമെന്ന കുറ്റവും അതിനുള്ള ശിക്ഷയും നിര്‍വചിക്കുന്ന ഈ സെക്ഷനില്‍ എ, ബി, സി, ഡി, ഇ, എഫ്‌ എന്നിങ്ങനെ ആറ്‌ ഉപവകുപ്പുകള്‍ പുതുതായി ചേര്‍ത്തിട്ടുണ്ട്‌. '...കമ്പ്യൂട്ടറോ മറ്റ്‌ ഇലക്‌ട്രോണിക്‌ ഉപകരണങ്ങളോ ഉപയോഗിച്ച്‌ മറ്റൊരു വ്യക്തിക്ക്‌ ഹാനികരമോ, വെറുപ്പുളവാക്കുന്നതോ, അപകടമുണ്ടാക്കുന്നതോ, അപമാനമുണ്ടാക്കുന്നതോ ആയ സന്ദേശങ്ങള്‍ പ്രചരിപ്പിക്കുന്നതും സ്വീകര്‍ത്താവിനെ തെറ്റിദ്ധരിപ്പിക്കുന്ന തരത്തില്‍ സന്ദേശങ്ങള്‍ അയയ്‌ക്കുന്നതും...' കുറ്റകരമാണെന്നാണ്‌ 66-എ ഉപവകുപ്പ്‌ പറയുന്നത്‌. ഈ നിയമമനുസരിച്ചാണ്‌, വിഷയത്തിന്റെ ഗൗരവം കണക്കിലെടുക്കാതെ, നാമറിയാതെ ഫോര്‍വേഡ്‌ ചെയ്യുന്ന ആപല്‍ക്കരമായ സന്ദേശങ്ങള്‍ നമുക്ക്‌ തന്നെ വിനയായി വരുന്നത്‌. മൂന്നുവര്‍ഷം തടവോ ഒരു ലക്ഷം രൂപ പിഴയോ ആണ്‌ ശിക്ഷ. 66-ബി ഉപവകുപ്പിലും ഇതേക്കുറിച്ച്‌ പരാമര്‍ശമുണ്ട്‌.

'...ഒരു കമ്പ്യൂട്ടറില്‍ നിന്ന്‌ സത്യസന്ധമായി ലഭിക്കാത്ത, അല്ലെങ്കില്‍, കവര്‍ന്നെടുക്കുന്ന, വിവരങ്ങള്‍ ഉപയോഗിക്കുന്നത്‌...' മൂന്നുവര്‍ഷം വരെ തടവോ ഒരുലക്ഷം രൂപ പിഴയോ അല്ലെങ്കില്‍ ഇതു രണ്ടും ഒന്നിച്ചോ ശിക്ഷ ലഭിക്കത്തക്കവിധമുള്ള കുറ്റമാണെന്നാണ്‌ 66-ബി ഉപവകുപ്പ്‌ പറയുന്നത്‌.

69-ാം സെക്ഷനില്‍ കൂട്ടിച്ചേര്‍ത്ത ഉപവകുപ്പുകളനുസരിച്ച്‌, നിയമത്തില്‍ പ്രതിപാദിച്ചിട്ടുള്ള സര്‍ക്കാര്‍ ഉദ്യോഗസ്ഥര്‍ക്കോ പോലീസുകാര്‍ക്കോ, സംശയം തോന്നുന്ന പക്ഷം നിങ്ങളുടെ സ്വകാര്യ ഇ-മെയിലോ എസ്‌.എം.എസ്സോ, മറ്റ്‌ കമ്പ്യൂട്ടര്‍ വിഭവങ്ങളോ മജിസ്‌ട്രേട്ടിന്റെ അനുവാദം കൂടാതെ തന്നെ പരിശോധിക്കാവുന്നതും തുടര്‍നടപടികള്‍ക്കായി സര്‍ക്കാരിലേക്ക്‌ ശുപാര്‍ശ ചെയ്യാവുന്നതുമാണ്‌.

ഒരു പ്രത്യേക കമ്പ്യൂട്ടര്‍ കുറ്റകരമായ കാര്യങ്ങള്‍ക്കുവേണ്ടി ഉപയോഗിച്ചയാളെ കണ്ടെത്തിയില്ലെങ്കില്‍ ആ കമ്പ്യൂട്ടറിന്റെ ഉടമസ്ഥന്‍ ഒന്നാംപ്രതിയാകുന്ന വ്യവസ്ഥയും ഐ.ടി. നിയമത്തിലുണ്ട്‌.

Disclaimer : 
        This email and any files transmitted with it are confidential and intended solely for the use of the individual or entity to whom they are addressed. Any views or opinions presented in this electronic mail are solely those of the author and do not necessarily represent those of the Sender.
WARNING : Forwarding E-Mails may be a criminal offense which comes under the section 66(a) & (b) of IT Act 2000

Malayalam Online Radios

http://www.radiojoyalukkas.com/playlist/rdja.asx


http://asx.abacast.com/arabian_radio-hitfm-24.asx 


http://www.spaceforradio.com/spaceforradio.asx

RADIO ASIA 1269 AM

 http://radioasiauae.com/new/radioasia/radioasia_am/user/program_home.php 

 OXYGEN 95.7 FM
 http://radioasiauae.com/2009_new1/


Hindi

http://asx.abacast.com/arabian_radio-city-24.asx

Tuesday, November 24, 2009

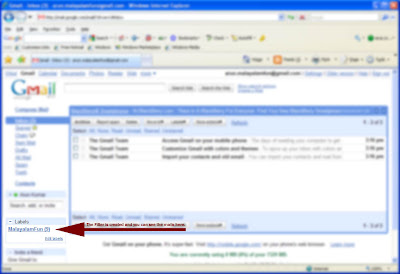
Filter E-Mails from inbox To a Label


You can Filter E-Mails from inbox To a Label

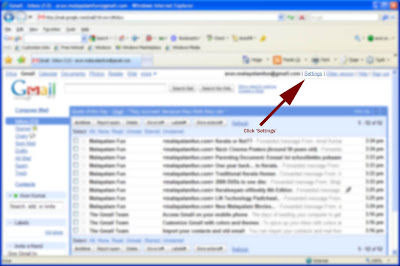
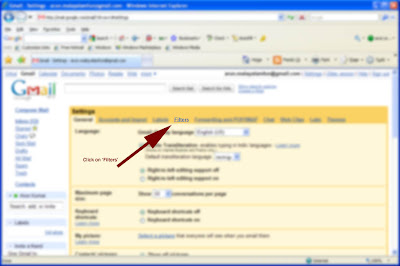
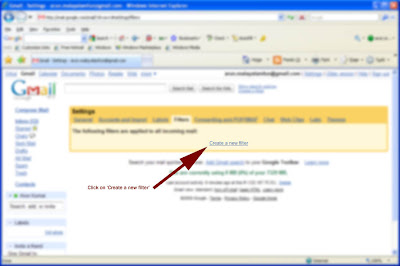
1.  Go To Gmail > Settings > Filters  > Create a Filter 
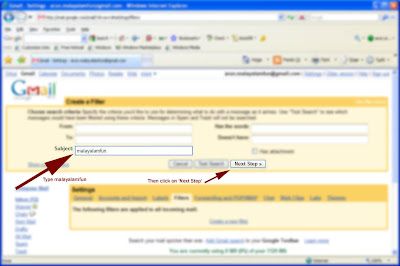
     You will get a Create Filter column.
     You can Filter Mails According to 
    • Sender's Mail id
    • Reciepient's Mail Id
    • Subject line
    • Mail Content
    • Has Attachment   
      Its your choice 

      I will give you an example:- 
      You want to filter all mails from me 
      Then, Give my Mail id  sharaflatheef@gmail.com  in "From " Column.
      Click Next Step......


      In the Next Page, 
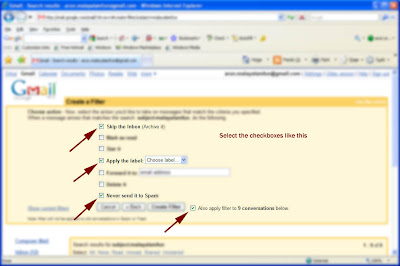
      • Tick > Skip Inbox
      • Tick> Never send it to Spam
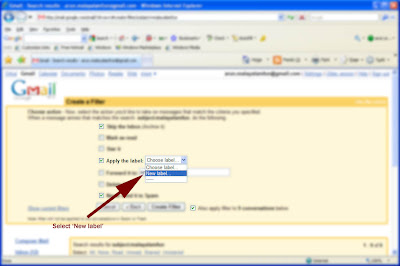
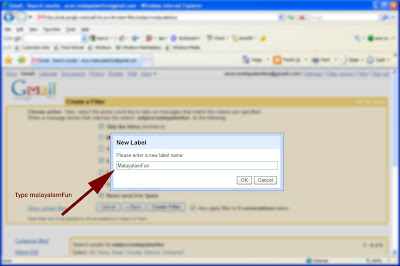
      • Tick>  Apply The Label >  In Choose Label > Create New Label > Give a Name Eg: Sharaf
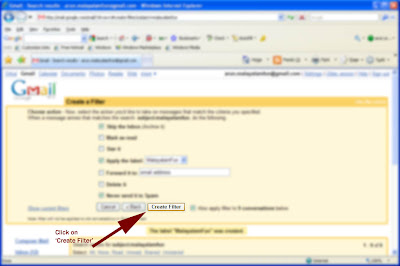
      Then, Click Create Filter. Thatz It...


      Note: If you want to filter my old mail, Tick > Also Aply to .... Conversations Below

      Note : For Best Perfomance, Use Firefox / Chrome

        
      You can Also check the pictures below


      Click on the picture to view full size.